How we got into steam bending
There is no steaming envisioned in our purchased plans. But we simply could not put stringers on our boat without cracking them, be it kiln dried fragile “supermall” timber or the better naturally dried lumbermill timber. We suspect it has to do with our added transom and thus a more complicated geometry.
Heating not only allowes you to bend wood like a bow, but also give the wood a torsion bend. This is highly impractical without steaming, as experience thaught us. What is more – the wood will hold it’s bend after releasing off the form. Of course, there is some springback, but that can be concidered for.
The PVC pipe design
The most common DIY steam bending solution you’ll find on the net is the PVC pipe housing plus some sort of source of steam.
Getting the pipe is rather straightforward – buy the necessary length of PVC pipe (with the diameter you need) that can stand up to 100 C temperature. Factories usually print this data on their pipes, but when in doubt, ask the salesman. You ought to buy at least one endcap to the pipe for fitting the inlet hose. The other end can simply be covered with a cloth.
Source of steam
This is where the DIY steam bending culture varies. Some use a tea kettle heated by a stove, some use a rebuilt metal gas canister heated by the good-ol campfire, some use rocket fuel.. We decided to try something that we had not seen before – two instant 1 L water boilers.
This choise was made because it seemed (and perhaps still seems) the simplest and best applied in an indoors environment. We can not make an open fire indoors, nor have we a proper stove. So we chose the mentioned kettles.
To use the kettles, one must remove the auto-switches to allowe for “infinite” boiling. Though care must be taken not to burn the kettle once the water runs out. You need water, it will keep the system at a constant 100 C. Otherwise – Tšernobyl.
A word on heat and plastic
Whatever plastic you use, be it the hose, PVC pipe, kettles or silicone sealant – make sure it can tolerate excess of 100 C, the boiling point of water. Otherwise bad things will happen fast:
- The steam hose can collapse on itself, causing overpressure in the kettle and in worst case causing an explosion.
- The PVC tubing can collapse on itself, rendering it usable only once.
- The silicone can simply yield and thus rendering the system usable only once.
A word on efficiency
Whatever the source of steam, covering your PVC pipe with old blankets will vastly improve the setup. The steam will be hotter, the pipe will actually get hot enough to pass steam (not only condensate) and the whole thing will happen faster.
Pictures, pictures, pictures!
Right, enough “discussion”, lets have it:
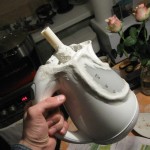
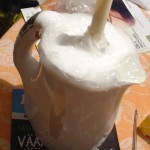
- Kettle no. 1
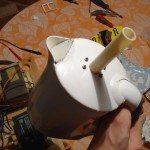
- Kettle nr. 2 viewing from top. The steaming tube is visible. You see it being held in place by some nuts and bolts. This is important, since we will be fitting the steaming hose on and off the kettle, it must hold in place when force is applied.
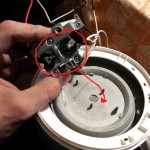
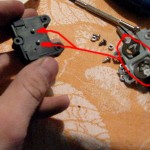
- After some time of pondering I finally figured out that the temperature switch is actually something pretty elaborate. The principle depends on little metal disks which snap-bend when temperatures near 100 C are acheived. Pretty neat. These sappers then push little tumblers which in turn cut the power to the kettle. On the picture you see two disks which were pressed agains the boiling element. There is also a switch in the handle, we’ll see about that in a minute.
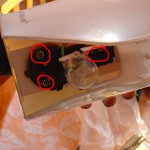
- Here are the guts of boiler nr. 2 (sounds like the Titanic sinking). Three metal disk switches in this kettle. Two at the heating element and one in the handle, as with the other boiler. These were easier to remove.
- A detail of the switch operation. When activated, the metal disks on the right press on the little white knobs on the left. This cuts the power. The black box with the white knobs looks pretty neat inside as well. A surprising design in its complexity, but using thermistors would require the use of some kind of transistors, meaning that his metal-plastic setup is cheaper.
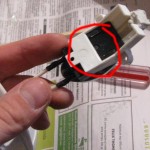
- Here is the switch which was in the handle. The kettle actually has a passage built into it, trhough which steam will go into the handle to wash agains the metal flipper switch. On the picture, unfortunately, I have already removed the disk.
- Ahh, smells awful, like a pair of rotten socks. Acidic RTV silicone. But this one works like a charm compared to the first kettle. After an hour it was dry to the touch, a bit squichy on the inside. Once cured, the working temperature is -40 to + 150 C. Suites just fine.
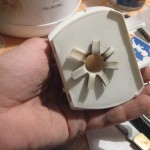
- Here is the top part, or the steam exhaust being built. Very simple, I did not spend any time on making it look good, as it only has to do what it is supposed to do, which is boil, not win beauty awards. The “rose” you see is there so that bolts could be fitted trough its petals, to keep the tube in place. A plastic washer went on top of the rose, bolts trough that.
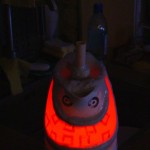
- The halloween kettle.
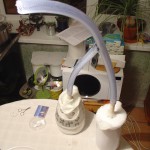
- The Siamese water kettles. The good and the bad twin.
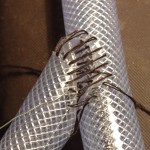
- Simple wire hook used to pull the stitches in. The Y joint really was tight. I blew trough the hose, barely a hiss from the stitches. I used a 1 mm drill bit to predrill the holes. It is possible to push trough the needle, but why the extra pain?
- Some silicone RTV to seal up the stitch.
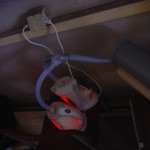
- The aorta of the steamer works like a charm. We now have a proper extention cord. This on-the-edge setup here is temporary. 1.7 L of water gets boiled with 30 minutes.
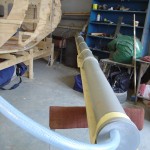
- Setup at our shop. The pipe is fixed to its strongback to keep it from deforming under heat. Testing showed that wrapping the pipe with rags is not necessary. Nor is it a must to pre-soak the wood. Perhaps so in hard bend situations, which ours is not. Saves us a ton of problems, otherwise we would have had to build a 5 m long bath for our planks. Using the tube as a soaker would have meant extra time spent.
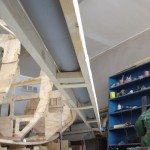
- The strongback from below.
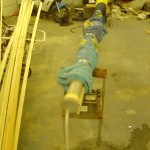
- One of the boilers failed and we had to rethink the setup. Blankets did a good job isolating the PVC tubing. One kettle proved fine.

