You’ll most likely have to smelt and cast lead if you are building a keel yacht. We smelted around 300 kg of former roofing lead. And this is how we did it.
A word of caution
There are two major concerns with smelting lead:
- Lead is toxic. Do not breathe in smelting fumes, wear gloves. Once it gets into your organism, it wont go out. Read more on Wikipedia. Lots of bad stuff can happen.
- Smelting lead is means lots of very hot metal. Wear incombustible long sleeves and long pants, goggles would not hurt either.
Getting the lead
We found our lead sold on a web-market. We got it at market price, so nothing was gained and nothing lost. It arrived in the shape of old roofing tiles, folded up like paper into various size pieces. So it was easy to handle and smelt.
A popular method mentioned on the internet is collecting car wheel balancing weights. It might be possible in parts of the world with a serious auto industry. And you probably have to invest a notable amount of time going around car-shops. You have to watch out though, lots of weighs are zinc alloys.
Doug Jackson from SVseeker collected a truckload of old bullets. That is definitely not a possiblity in Estonia, as we do not have that many gun ranges and guns are in general not very common among citizens. Then again, I never investigated.
-

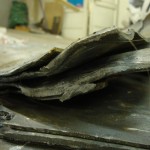
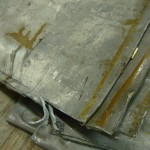
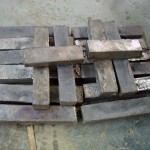
- Our ballast – 300 kg of lead. Previously used for roofing.
Melting the lead
If you are melting for anything larger than a fishing bait counterweight, then get a serious-serious buthane torch. Better yet, rent it! It is relatively cheap. We tried to work on a 1 kW mono-iron stove (the kind in a kitchen) and failed – hard. That includes covering the pot with a lid and helping it along with a handheld butane torch. The lead simply did not melt. We waited for hours.
So we got a 60 + kW rated torch and 11 kg of industrial gas.
-
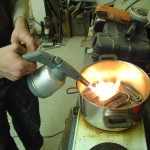
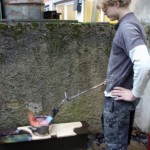
- We argued that there needs to be a liquid lead layer covering the bottom of the pot to improve conduction. Uku took out his 1,5 kW butane burner and went to the rescue. Indeed, it helped melt the lead, accelerated the process, and a pool was formed. But the process was asymptotic – after removing the torch and adding lead. The pool froze, only a small part of it remained liquid in the center of the pot, where the heat flux was greatest (edges of the pot were cooled by air). All this, meaning, all this nothingness had taken us an hour. Bad news – we needed more power.
-
- On the 30th of December we took the next step in smelting lead. A max 50-60 kW industrial gas burner. A potfull of lead melted in about 5 minutes. A vast improvement over our last experiment. This was great fun.
-
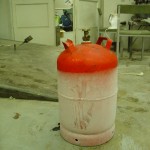
- We rented the gas and the burner from a local tool-renting company. 11 kg of industrial gas and the burner. On the picture is the gas container after we finished pouring the lead. We do not have snow on the ground in Estonia, but that evening it was on the gas container. Thermodynamics in action – the gas expands and chills the container. We calculated that we needed roughly 3 kg of butane to melt all the lead we had. We definitely used more. This was due to losses. Smelting lead outside with near freezing temperatures has its drawbacks. Not enough though to keep the 50-60 kW burner at bay.
The mould
We needed lead bricks, so we welded up a brick shaped mould. The only problem – it took a lot of work to get the cooled bricks out. This might have happened for a couple reasons:
- Form walls too near to right angle
- Too deep form
- Crappy form-welds
What did pay off was making the mould of 5 mm steel, so it managed a lot of abuse before disintegrating. We were just starting to learn welding and it was a really messy job. I stitched the whole thing up with chicken shit welds. Lots of porosity and sputter. I think tacking the walls here-there would have sufficed.
In the end, lead smelts 327.5 degrees Celsius and that is not very hot. You can use pretty much any metal container as a mould. Custom solutions are needed when you need a custom shape, as we did. Very often muffin molds are used for lead, like here.
-
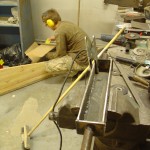
- While Joosep worked on the rudder, Uku continued welding the lead casting form. The DIY MOT welder was resurrected and put to good use. Turns out that stick welding takes time and patience to learn. A few tips: constant arc length and keeping an eye on the metal puddle.
-
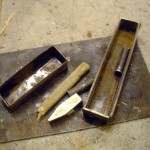
- Releasing the ingots from the form had its toll on the tools. The form, on the right, lost both handles, its general shape and vigour, cracked a wall. A hammer snapped, the workshop floor suffered some damage and a second, scrap metal form was damaged.
-
- All done! All this work was needed to put the metal we had into another shape. Fantastic how things work.
The pot (crucible)
We used a thick bottomed 10 L stainless steel pot as a crucible. It worked just fine. It got glowing hot when smelting, even red hot, but it held well – still does. A stainless steel kitchen pot will do fine.
I heard people say that the cheapest enamelled soup pots work too. By personal experience I know that the enamel has a tendency to pop off the pot due to a difference in heat expansion of the materials involved. For example – leave an empty enamel soup pot on the stove. Soon it’ll pop like popcorn, little bits of enamel flying. The forums say that they’ll do, though.
We melted off the pot handles with our first try and ended up welding a loose fitting lifting and pouring fixture around the pot from scrap metal. That worked out fine, no spills. Could not have done without it. See the picture for reference.
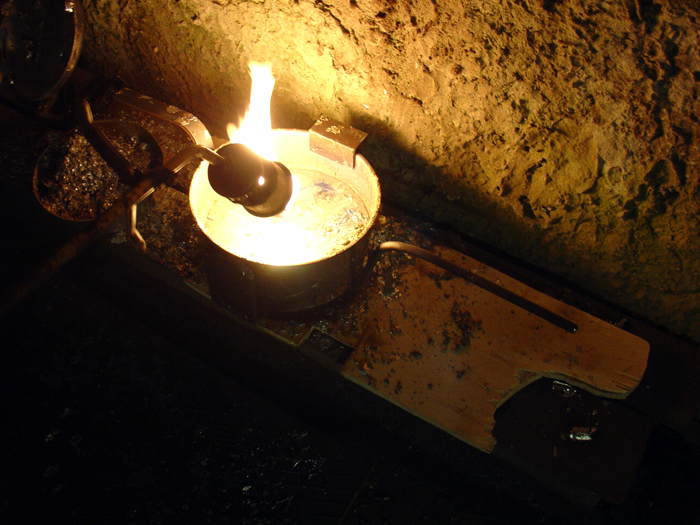
The wood base plate seen on the picture is for insulating the pot from the large steel I beam.
I’m looking for a bill of materials for fafnir , I have the plans for the boat and I’m getting ready to build it. Any help would be much obliged
Thanks
Hello Ethan!
We have a semi-complete running tally of the costs in a spreadsheet, but it’s in Estonian. You can find it here: https://docs.google.com/spreadsheets/d/1lfAsTtl1DS2vZfgrdxjfVW_XnXFPSUNjR4QR3xCzmdw/edit?usp=sharing
Cheers
Joosep